

Facebook is a potent tool not always used to its full potential. Many businesses underestimate its power or don’t consider it worth spending the effort to establish a good presence on Meta’s flagship platform.
Allowing you to reach your target audience, Facebook has a mighty engine ready to filter by user behaviors, demographics, interests, and many more. This will ensure your brand awareness or products reach the right audience without wasting valuable resources.
But before advertising our business throughout the platform, we need to create a new Facebook Ad account. The process is much more straightforward now that Facebook Ad is integrated into the new Meta Business Manager, also called Meta Business Suite. This is what we will see today in a simple step-by-step guide.
Without further delay, let’s check the different actions we need to take to maximize our Facebook Advertising strategy!
Creating a Facebook Page for your Business
Let’s start by having some presence on social networks. Your Business Page on Facebook is the virtual face of your Brand. Creating a Facebook page will help you engage with potential customers and build community, a must-do nowadays. It may also help you strengthen relationships with interested buyers and start conversations.
If you already have a Facebook page for your business, you may skip the rest of this section. If you do not have one yet, the steps are pretty simple:
- Create a Facebook account. Some people prefer setting up a new account to manage a business page. This comes down to personal preference, using your personal profile or signing up as a new one just for your company to keep things separated.
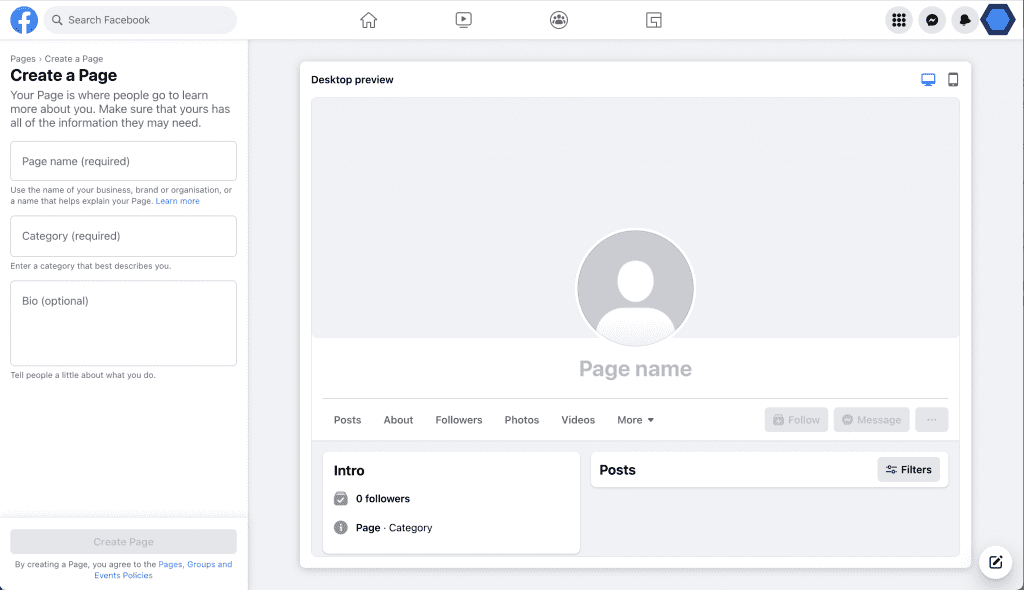
- Once logged into Facebook, you’ll need to go to “Create Page” to start. This option can be found in the menu, in “Pages” -> “+ Create”.
- Select the proper categories for your page. Time to choose the categories which best classify your business. This will help users to find your page. Bear in mind you can select up to three different categories.
- Naming your page. After your page has been classified, you’ll be requested to type your new business name. Add your company or brand name in this section.
- Adding your website. This is an optional step, but if you have one, it’s a good idea to add it. You’ll gain some traffic to your site, which is always good while giving your Facebook Page a more professional look.
- Upload your Business’ profile and cover photo. This is what visually defines your brand, so choose them wisely. For a perfect fitting, you can use a profile picture of 180×180 pixels and a cover photo of 820 by 312 px.
2. Accessing the Meta Business Suite
Facebook Business Manager was a platform by Meta to allow Business Owners to manage their Business Pages easily. This platform has recently been replaced by Meta Business Suite, enabling you to separate your business activities from your personal ones in the social network.
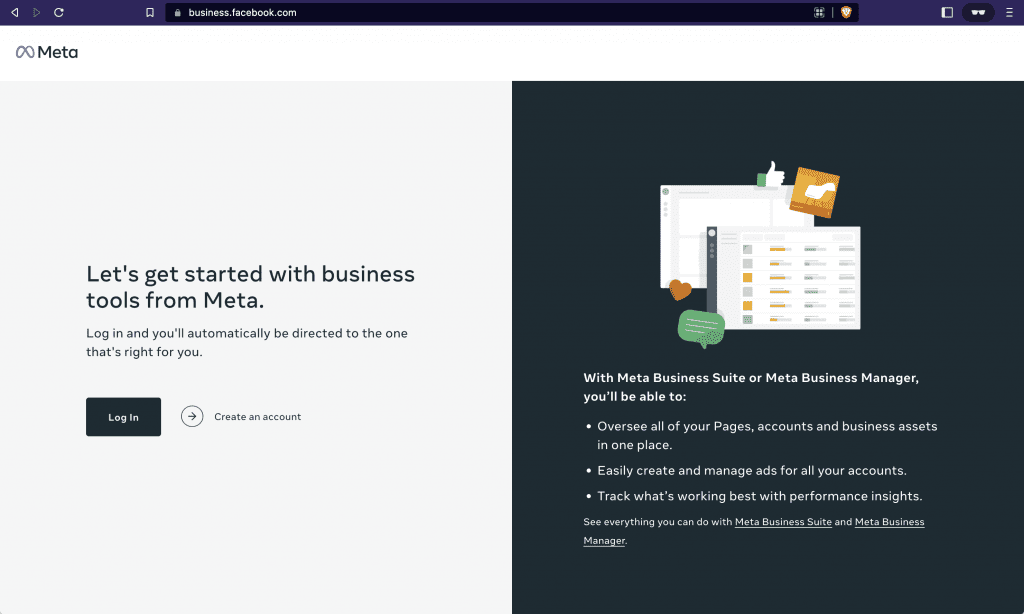
Let’s start by accessing business.facebook.com. If you are not logged in, the newly branded Meta Business Manager page will ask you to log in:
After you log in to the Meta Business Manager using your personal Facebook account, you will now see your Business Page already associated with your Meta Business Suite:
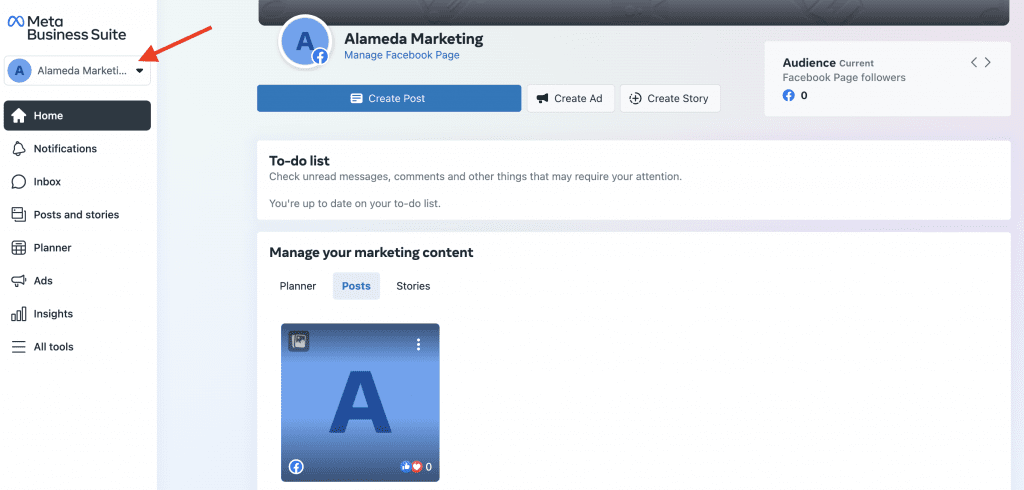
This process is much simpler now in the Meta Business Suite compared to the previous Facebook Ad Manager.
No need to link your business page as it is now part of the Business Manager by default. Meta has now also put together all their products under the Meta Suite, so you can easily link your Instagram and WhatApp accounts to interact through these platforms or run ads on different channels.
3. Adding a Payment Method
You will need a payment method when you start running Ads from your account. It can be included later, but you might as well do it now to leave everything set up nicely, as you can also change it in the future.
Let’s go down in the left menu to option “All tools” and select “Billing”:
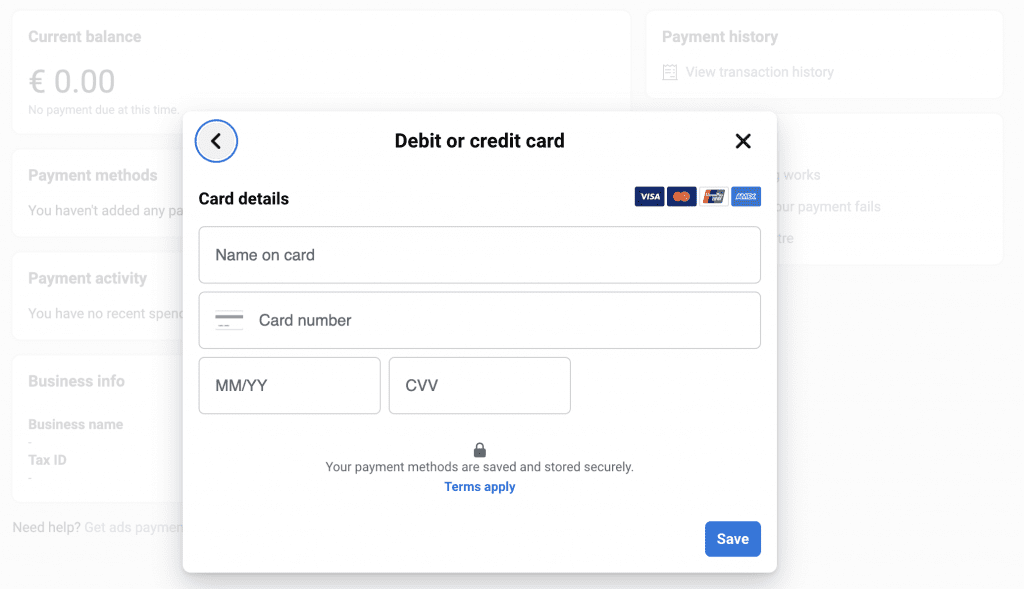
Here you can fill out the form with the card details you would like to use for your Ads:
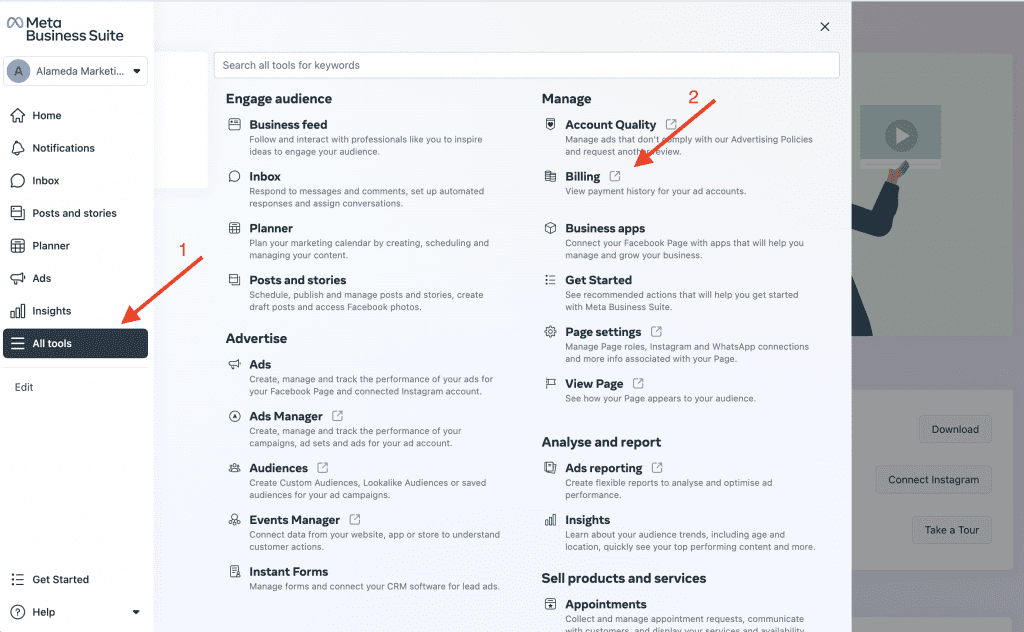
This will open up a new tab where you can see the list of transactions, account limits, or some filters to find your financial operations. We need to click on “Payment Settings” at the top right part of the screen to open the payment details:
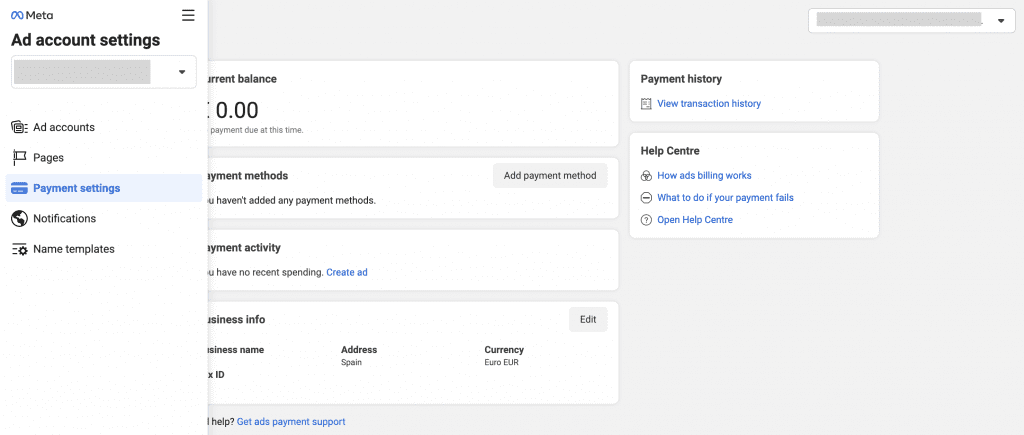
Then, if we click on “Add payment method”, we will be asked to choose where we are, add our tax information in case we need it, and add our preferred payment mode.
For the time being, available options to pay are Paypal, Bank transfers, and Credit or Debit cards:
4. Understanding your Ad Account
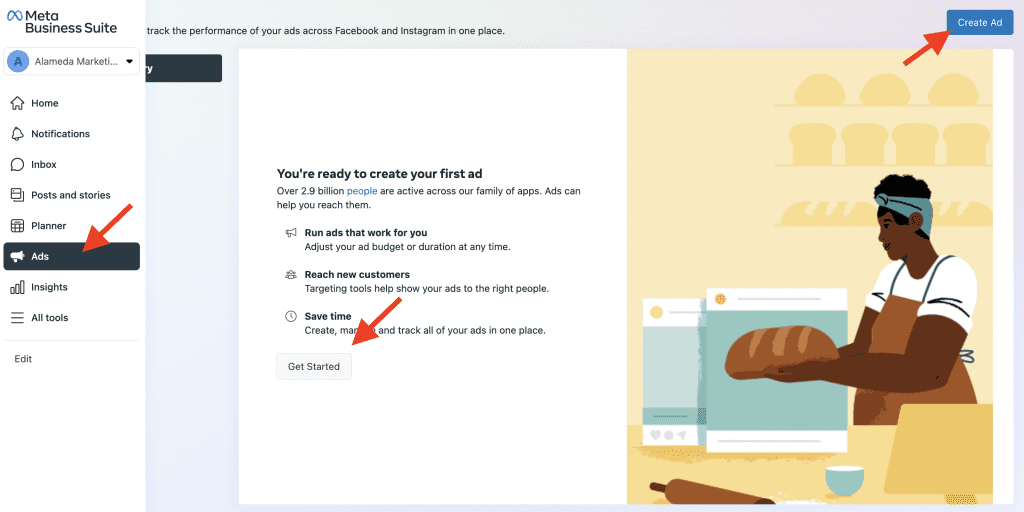
We are now ready to start creating ads from the Ad Account of our Meta Business Suite. This is relatively straightforward, you just need to go to Ads in the menu, and then click on Create Ad or Get Started:
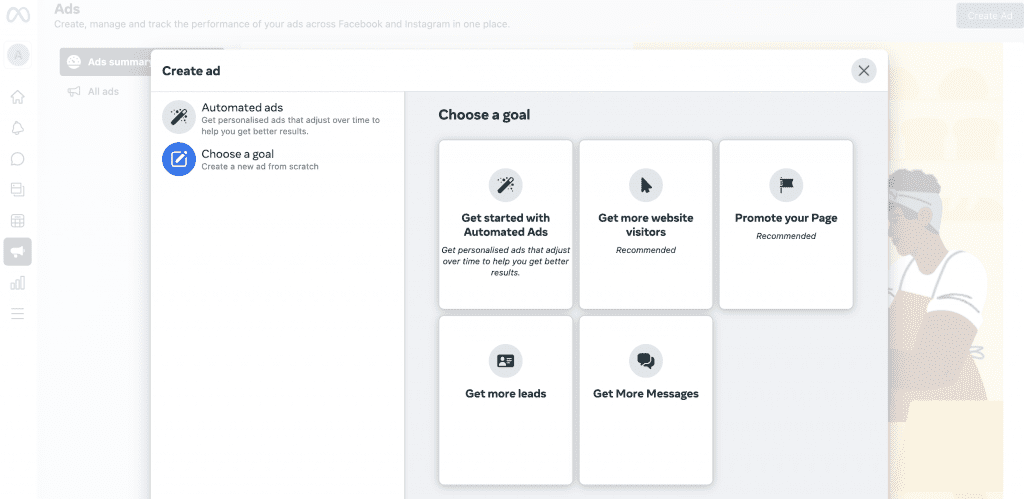
Now Meta’s wizard for ads will guide you through the Ad creation, where you can start by choosing the goal of your ad in fundamental terms:
- Automated Ads, which will adjust over time
- Get more website visitors
- Promote your Page
- Get more leads
- Get More Messages
Follow Facebook’s wizard, and voilá, your Ad account is now ready to rock and roll.
Lastly, you can go to “Tools” -> “Ad Manager”, where you will get a detailed view of your Campaigns, the powerful brain behind your Ads:
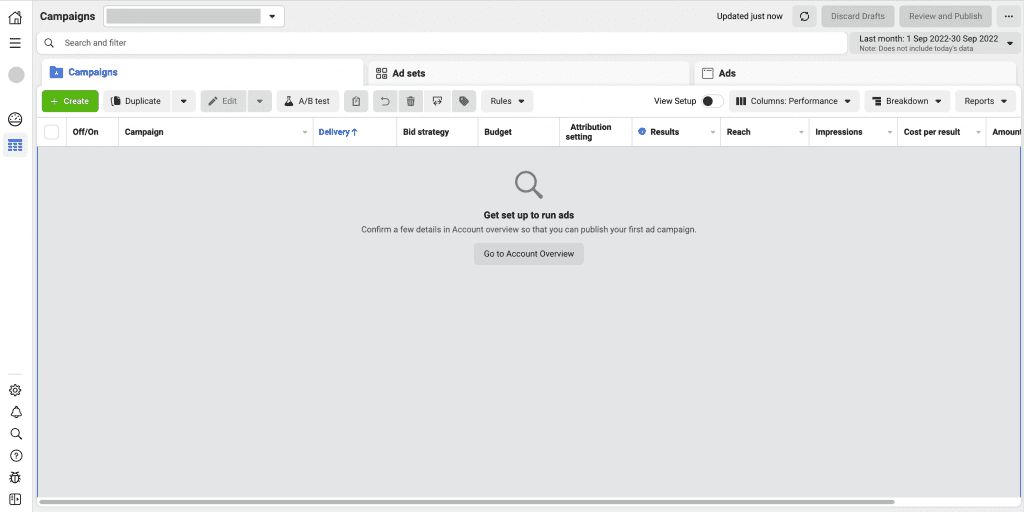
As we can see, Meta has facilitated a lot of the Campaign Creation process on Facebook. Previously, we had to create a Facebook Ads Manager account, link it to our Page, provide user permissions, and so on.
Now, everything is seamlessly integrated into the new single Business Manager platform from Meta.
5. Start creating Campaigns
You have all the necessary setup to start Creating Ad Campaigns and targeting the right users at this stage. A poor target audience will lead to inefficient campaigns. Ensure you create impacting Ads with adequate images and copywriting to engage with your intended customers.
Inefficient strategies will lead to money being spent in a suboptimal manner, apart from the time spent. The more you can narrow down your segments, the more likely your campaigns to succeed.
You can do it all by yourself, but if you want to save research time or need a hand in creating the most suitable campaigns, you can count on Alameda Marketing. Always happy to help.
Just drop us a message and tell us about your case. Or have a look at our Facebook Ads Services.
¡We will be glad to hear from you!